Mode: Classic Scanning
With classic scanning you can connect standard USB and network scanners to WDIScan.
Requirements
Section titled “Requirements”- USB scanners: Chrome/Edge browser (WebUSB) (+info);
- Network scanners: Chrome browser with WDIScan Connector extension (+info);
- Protocol: Mopria eSCL (Apple AirPrint);
Many recent scanners and all-in-one printers already support eSCL/AirPrint, check your manual.
Depending on your OS and scanner type you may need to do some extra setup:
| OS | USB Scanners (Chrome/Edge) | Network Scanners (Chrome) |
|---|---|---|
| Windows | Use Zadig (+info) | Extension (+info) |
| macOS | No extra setup | Extension (+info) |
| Linux | Disable ipp-usb (+info) | Extension (+info) |
USB scanners
Section titled “USB scanners”Using USB scanners requires a Chrome/Edge browser with some extra steps depending on your operating system.
Windows
Section titled “Windows”When connecting to a USB scanner on Windows you may see a “scanner in use” or generic error message. Most likely your system does not have the correct drivers installed.
Follow these steps to install the correct drivers (WinUSB) using the free tool Zadig.
No extra setup, just connect the scanner and start scanning.
When connecting to a USB scanner on Linux you may see a “scanner in use” message, even when the scanner is not actually in use. This can happen when ipp-usb is installed on the system.
The ipp-usb service is used by other programs to access USB printers/scanners. But because WDIScan is also trying to access the scanner directly through USB, it causes a conflict.
One solution is to disable ipp-usb, e.g. using systemd:
sudo systemctl disable --now ipp-usbAlternatively, you can also use the scanner through ipp-usb as a network scanner. This involves installing the extension (as explained in the next section) and connecting to the scanner at the default ipp-usb address localhost:60000, or any subsequent ports i.e. 60001, 60002 etc. Find the exact address using DNS-SD:
avahi-browse -rt _uscan._tcpNetwork scanners
Section titled “Network scanners”Using network scanners requires installing the WDIScan Connector extension:


Connecting
Section titled “Connecting”On the WDIScan dialog select the scanner type:
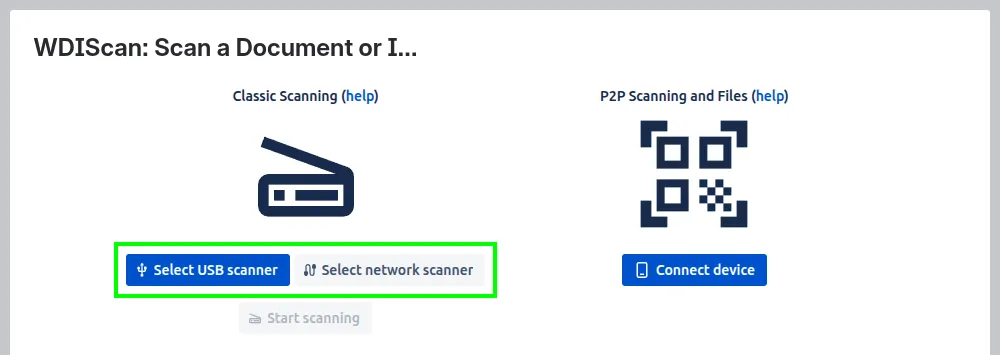
For USB scanners click “Authorize a USB scanner” and select the scanner:

For network scanners you need to provide the IP address or hostname:

Scanning
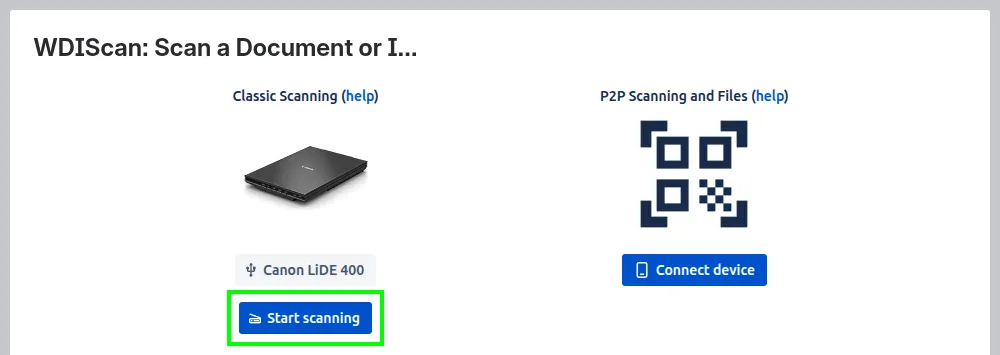
Section titled “Scanning”After connecting the scanner click “Start scanning”:
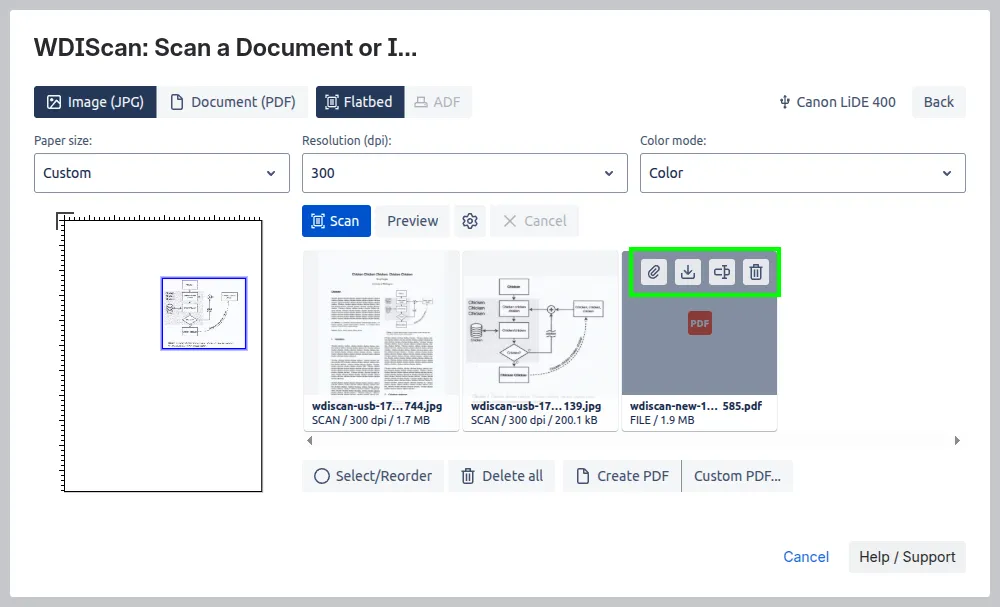
Select the scan mode “Image (JPG)” or “Document (PDF)” and depending on your scanner type, select “Flatbed” or “ADF”, change other scanning options (check the paper size) and click “Scan”:
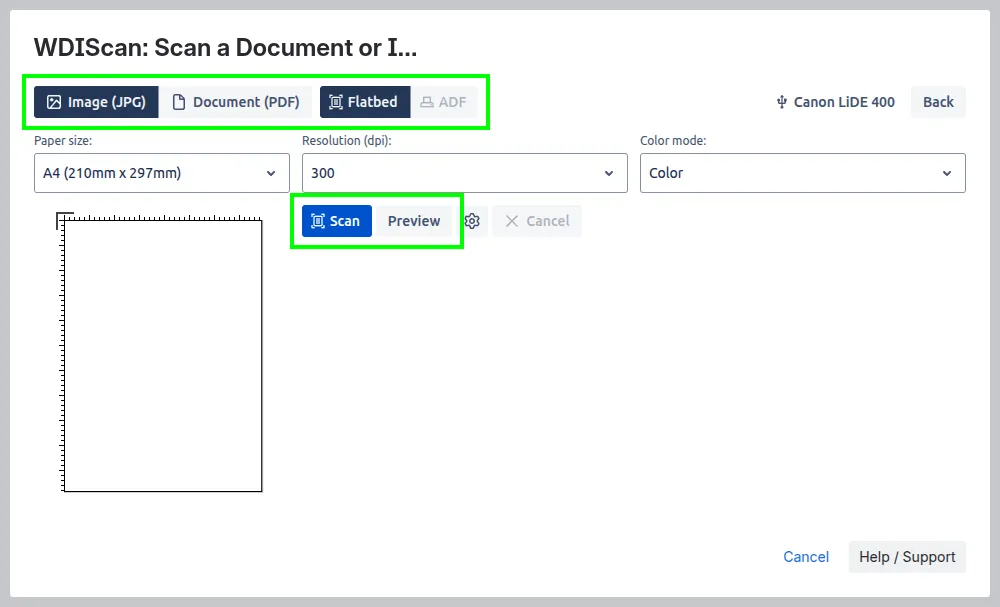
You can also “Preview” and select a custom scanning area on the paper diagram. To create a PDF from individual images click “Create PDF” (or “Custom PDF…” for more customization options):
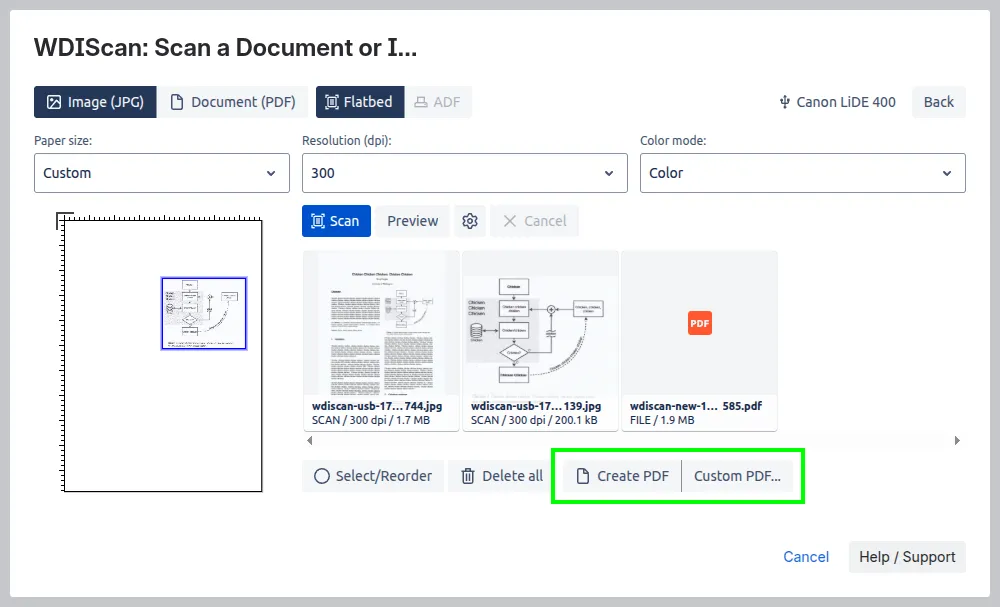
At any point you can attach the scanned files to the current Jira issue by using the action bar on each file, any files not saved will disappear once the dialog is closed:
That’s it for now, feel free to explore all the other options.
Contact us with any issues or questions.